Monday, 06 June 2022
3 years ago
7 minutes read
- Laravel
- GraphQL
- Testing
- Backend
- PHP
- Minio
- S3
- Buckets
Laragraph - S3 my thumbnails - Part 3
Are we seriously building a blog API without the possibility to upload a thumbnail?! Nah! We have to solve that! For this third part of Laragraph we will see how can we upload files to S3 with Laravel and GraphQL. Do you like this topic? Stick around and come with me during this journey of learning things 😎

Tiago Sousa
Software Engineer
Introduction
I don't know about you, but for me uploading files is always the trickiest and funniest part when building a product. How should I save the file? How should I validate the file? Where should I save the file? The feedback that I got from the poll that I created on twitter shows that most of you probably feel the same way as I do so let's have a look into this topic!
Before cloud native was a thing, the files were being saved in the same place where the code for the application was deployed, normally in a VPS (Virtual Private Server). As you can imagine this may bring about some problems... What if your VPS dies? You lose all the images? Having this example in mind and many others that software engineers were facing a solution called S3 came into the market. S3 stands for Simple Storage Service and it's basically an object storage service that offers scalability, data availability, security, and performance. You know... all those things that cloud native services and applications offer!
Nowadays, almost every single cloud provider has a S3 service like Amazon S3, Google Cloud Storage or even Azure Storage.
This solution really changed the way that engineers develop their applications and with so much traction some on perm solutions like MinIO appeared.
MinIO
MinIO is the perfect solution for your development environment as you can simply define it in your docker-compose and use it out of the box, instead of subscribing and paying for object storage for your team's development environment. If you want to manage your own S3 service you can deploy MinIO in multipe ways and host it in your cloud native environment, independently of the cloud provider you are using. But today we are not talking about cloud in depth, so let's focus on our problem and start configuring MinIO for our development environment.
Laravel Sail already comes with support for MinIO, which is great! It will take a little bit of boilerplate and configuration from our side.
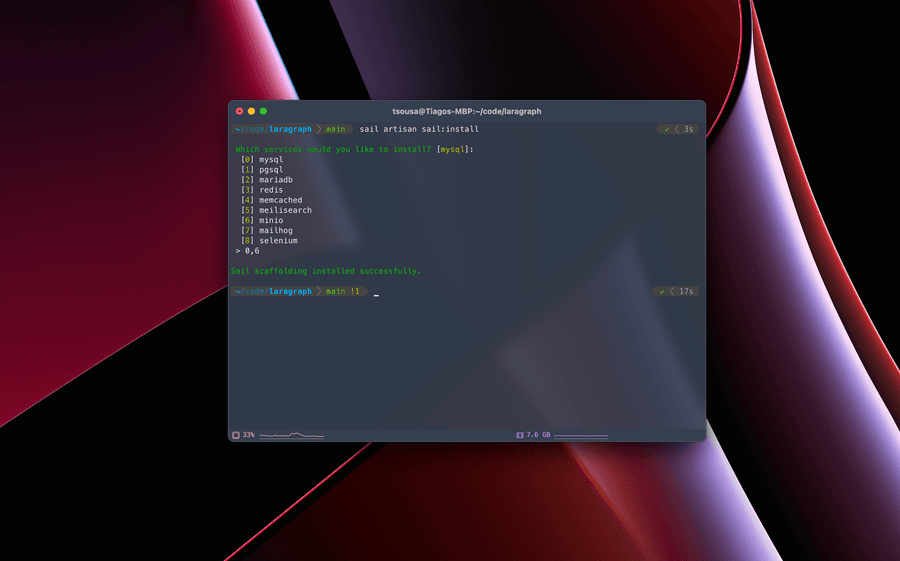
To install MinIO let's just re-run the install command and select both MySQL and MinIO by typing 0,6 after running the following command:
NOTE:
If you have php installed on your machine you can also use
php artisan sail:install
NOTE:
You need to have your containers running before running the
sail:installcommand. For that runsail up -d.
After this, your docker-compose file should be updated and MinIO included and configured! Before checking if everything is working with our development environment we still need to update our .env file
to tell laravel to use s3 as our drive for the file system:
.env
We also need to update our environment variables regaring S3 configuration
.env
NOTE:
Laravel uses
AWS_*environment variables to configure the file system but it will work for every cloud provider, you just need to put the correct values.
Now that we have everything installed and configured let's check if everything is okay by starting our docker development environment:
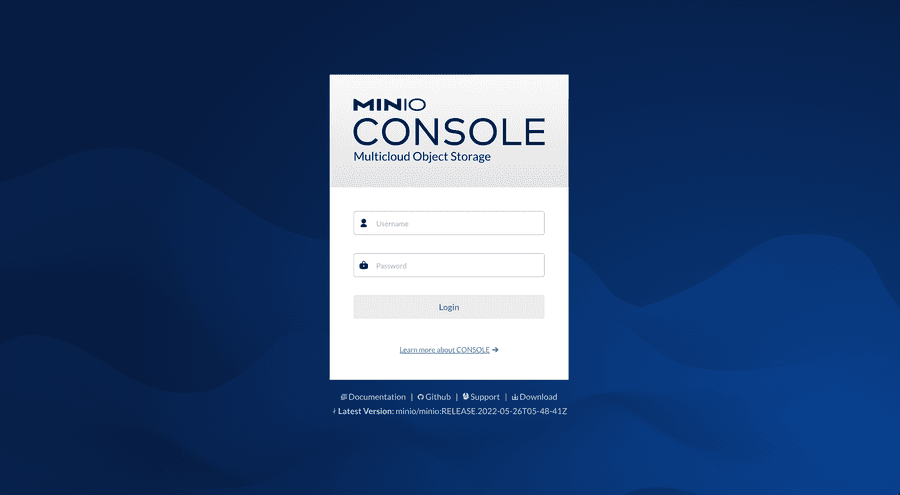
If we did everything correctly, our MinIO should be available at http://localhost:8900/
NOTE:
The username and password should be the values defined for the
AWS_ACCESS_KEY_IDandAWS_SECRET_ACCESS_KEY
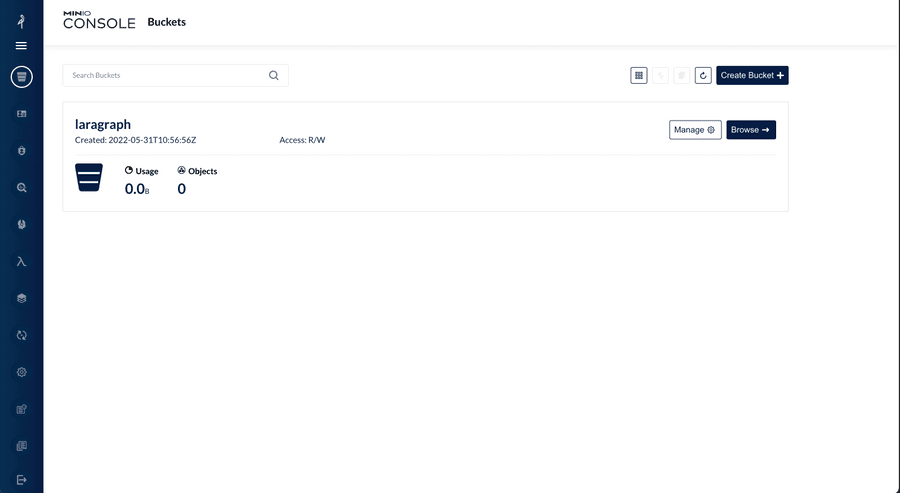
When we changed our application environment variables we added AWS_BUCKET=laragraph, but when starting the MinIO container it doesn't come with any default bucket...
For that we can create a docker container that will use MinIO client (which is called mc)
in order to create a default bucket for us called laragraph as we previously configured in our .env.
docker-compose.yaml
Let's run our development environment again in order to start the container that will create the default bucket for laragraph.
If you refresh your MinIO you should now have a default bucket called laragraph 😎
Testing the upload
At this point everything should be configured, so let's see if we can get images uploaded to MinIO from our laravel application.
I often define a /foo route in my web.php file to test these kind of things!
For this test let's just try to drag a random image to your bucket and access it with laravel Storage facade.
If we are able to, then we are sure that everything is working as intended!
routes/web.php
Now if you access the /foo endpoint you should see an array of images that you dragged into our laragraph bucket, right?
Well, theoretically yes, but unfortunately no ... At this point we are presented with an error saying:
Which basically means that we are missing a dependency so let's fix that!
Now, let's try again and refresh the /foo endpoint 👀
Yeahh, now we're talking! An array of images from our MinOI instance! 🥳
With this we are certain that everything is well configured and we are ready to write some code 🔥 (I know that you were waiting for this 😉)
Take me to the clouds
Lighthouse facilitates the upload of files by providing a scalar for it as you can see here.
In order to enable this scalar, we have to define it in our schema. I like to have all scalars defined at the beginning of the file, but you can add them anywhere.
graphql/schema.graphql
After adding the scalar, we need to use it! In our Article type let's add a new field: The thumbnail
graphql/articles.graphql
Well, it looks like we have a new field! So we need to:
- update our
CreateArticleInputValidatorin the schema - update our migrations
- update our models
- update our validators
- update our logic to upload the thumbnail
Starting with the schema let's add the scalar that we previously defined
graphql/articles.graphql
Now let's add the thumbnail field as a nullable field.
database/migrations/create_articles_table.php
The third step is to update our model and add the thumbnail as a fillable field.
app/Models/Article.php
Now let's validate our thumbnail. But first let's create a use case just for the sake of this demo project!
Sometimes our user will upload a thumbnail but when he doesn't we want to return a default thumbnail for him! That's why we added the thumbnail field as nullable
Regarding validation it's pretty straight forward! Sometimes we want to validate the image, sometimes we don't! Let's see how can we do this in our validation class
app/GraphQL/Validators/CreateArticleInputValidator.php
NOTE:
The
imagevalidation comes from laravel and it will ensure that the image has a jpg, jpeg, png, bmp, gif, svg, or webp extension. If you want to have a deeper look into the validation rules feel free to check them here.
To be honest, this can't get more easy, right? Right? .... Well how can we return a default value when the thumbnail is null?
Laravel has something called Accessors & Mutators which are ways of manipulating values when they are accessed or set.
What we want to do here is to set a default value when the thumbnail is null and for that let's define an Accessors in our Article model.
app/Models/Article.php
At this point, the only missing step is to change the logic for the store method in the ArticleMutation to allow file uploads!
app/GraphQL/Mutations/ArticleMutation.php
You may be thinking that this isn't the correct way to do things and you are right... There are a lot of things that we should ensure here. For example we should only create the article if the image is successfully uploaded or, if the image is uploaded but the article failed it's creation, we should remove the image. I could cover all these topics, but the article would be too extensive so I will let that part open for you to try and implement as well 😉
NOTE:
When you are building your product be sure to always have this in mind!
Let me try! 🥹
Now that we have everything we need implemented for our feature let's try it out!
Unfortunately, the graphql playground that we have out of the box available at http://localhost/graphql-playground doesn't provide a way to upload files so we will have to switch to something like
postman in order to upload a file or use a curl request.
cURL me!
In order to understand that both the creation for our articles work with and without the file upload let's make two requests
- without file upload
If everything is working as expected for this request we should expect the thumbnail to come with the default thumbnail path that we previously defined and guess what 👀
- with file upload
NOTE:
Don't forget to change the last
--formvalue to a valid image path from your machine.
Now if everything is working as expected (which i'm pretty sure it is 😎) the output should be the url for our image!
POST me MAN
As I said, we can also use postman to test this out 😎
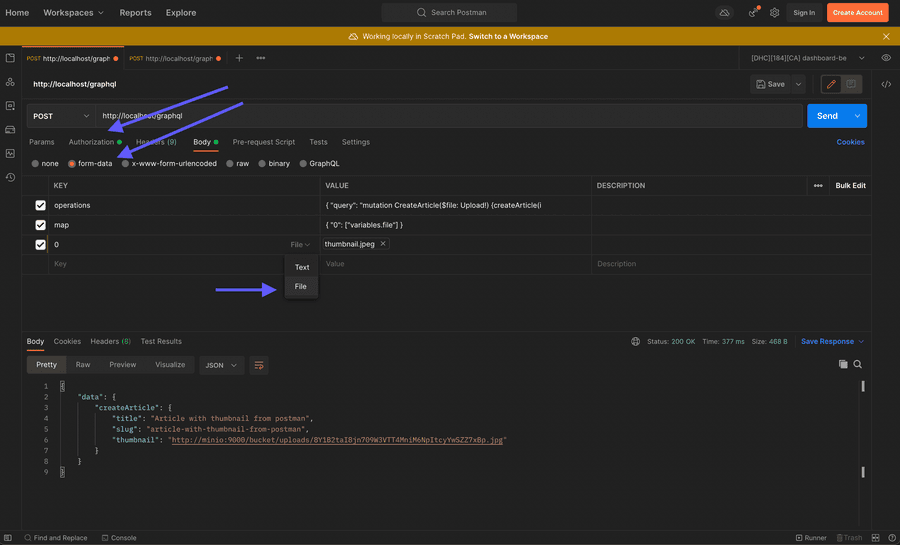
When configuring the request, don't forget to add your access token in the Authorization tab, to define the request as a POST and the mapping for the file to be type of file.
In order to be easier for you I will add the configuration for the operations and map values below
Operations
Variables
Don't you dare fail! 😡
As part of this series I also want to cover testing as I think thats a very important topic and isn't as much time consuming as people think.
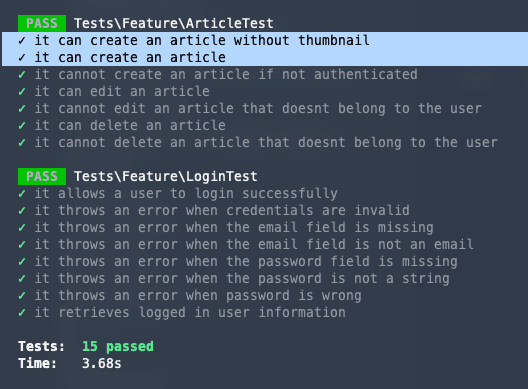
Let's start by rename the can create an article test to can create an article without thumbnail as the logic changed a little bit.
Laravel offers a really nice fake() method as part as the Storage facade that will allow you to easily generate a fake disk that simplifies the testing of file uploads.
This method from the Storage facade combined with fake() method from the UploadedFile will make you feel like you are cheating when you are writing tests for file uploads.
The fake() method from the UploadedFile will return a File instance that you can use to simulate a real file for testing purposes.
Now that the basics are explained let's replace some code, shall we?
tests/Feature/ArticleTest.php
We already ensured that creating an article without a thumbnail will work and a default value will be returned for it. Now we have to ensure that, when creating a new article with a thumbnail, it also works!
tests/Feature/ArticleTest.php
To run our suite now just use sail and your tests should pass! 😎
Conclusions
It's been a while since I wanted to test MinIO and I think this was the perfect occasion for it. This was probably the third and last part of laragraph as I don't think I have more ideas to continue this series, but if you have any suggestion for part 4 feel free to reach out to me! 🙏
As always, you can find the implementation for the entire article in this Pull Request!
If you found this article interesting, feel free to share it with your colleagues and friends, because you know... Sharing is caring!
Also, if you enjoy working at a large scale in projects with global impact and if you enjoy a challenge, please reach out to us at xgeeks! We're always looking for talented people to join our team 🙌

Written by Tiago Sousa
Hey there, my name is Tiago Sousa and I'm a Fullstack Engineer currently working at xgeeks. I'm a technology enthusiast and I try to explore new things to keep myself always updated. My motto is definitely "Sharing is caring" and that's exactly why you are currently reading this!
