Monday, 23 May 2022
3 years ago
6 minutes read
- Laravel
- NextJs
- OAuth
OAuth, API and NextJs App in 5 minutes
Nowadays authenticating apps with OAuth and Laravel almost looks like cheating! Imagine in 5 minutes having an API in Laravel, a frontend in Next and OAuth integration with 1001 services available! Let's have a look into it while creating blah, shall we? Blah will be used in the future to explore more things around Laravel ecosystem

Tiago Sousa
Software Engineer
Introduction
Nowadays, almost every single application allows OAuth integrations so users don't have to go through the boring and long registration flows. Besides simplifying (by a lot 🥵) the registration flow, it also provides the developer that is implementing the authentication system with a lot of information, out of the box, regarding the user.
With this article, we will learn how can we setup an authentication system with Laravel and NextJs in minutes whilst adding the possibility to login with GitHub and Discord!
I called this application Blah and decided that this application will be the starting point for exploring more things within the Laravel ecosystem so that
I can create more content and share more things with you 👀
Sail me!
If you have been following what I publish, you probably already saw the required steps on how to setup Sail. Sail is my go-to regarding developing with Laravel because it is really easy to setup and, as developer, I don't need to have the dependencies installed locally. If you want a full overview regarding Sail you should check this out 🚀
For this use case, we will install Laravel and Sail directly with a magic curl request and name the application blah-be (which stands for blah backend, of course) and require mysql as a dependency.
NOTE:
I suggest creating a
blahdirectory,cdinto it and run the command so in the future theblah-uistands at the same level
After creating our backend and having it ready with Sail we just need to run the command below in order to bring up our development environment.
After running this command you should be able to interact with your new backend application at http://localhost.
Oooof, some breeze ❄️
Laravel Breeze allows you to setup an entire authentication system for Laravel with just a couple of commands and in no time. It includes a lot of features like login, registration, password reset, email verification and password confirmation.
We will use Breeze ❄️ to easily setup this conventional authentication system and allow our users to login in Blah with email and password.
To require Breeze into our project run the following command in your terminal:
And now, to install it, run the following command:
The api argument will tell Breeze to not publish the breeze ui assets in our resource path since this application will only contain the API logic.
At some point we need to allow users to login in the application, so let's create a couple of users with seeds before closing the backend part and jump to our NextJs application 😎
database/seeders/DatabaseSeeder.php
Finally, run the migrations with the --seed flag and we are done with the backend for now 🔥
Next, let me in!
Before setting up the OAuth functionality, let's create our NextJs application and try to login one of the users we created with seeds,
in order to test if we are able to login with email and password.
The Laravel Team created a boilerplate for NextJs and Breeze so let's KISS and not reinvent the wheel. Let's use this!
Under the blah folder (that I suggested creating) at the same level where blah-be is, run the following command:
This command will clone this repository, rename it to blah-ui and remove the .git folder.
After doing that, let's create our .env file for the development environment with NEXT_PUBLIC_BACKEND_URL pointing to our blah-be url.
Are we done? Almost! Just install the dependencies and run the application! 😎
After running the command, our frontend should be available at http://localhost:3000.
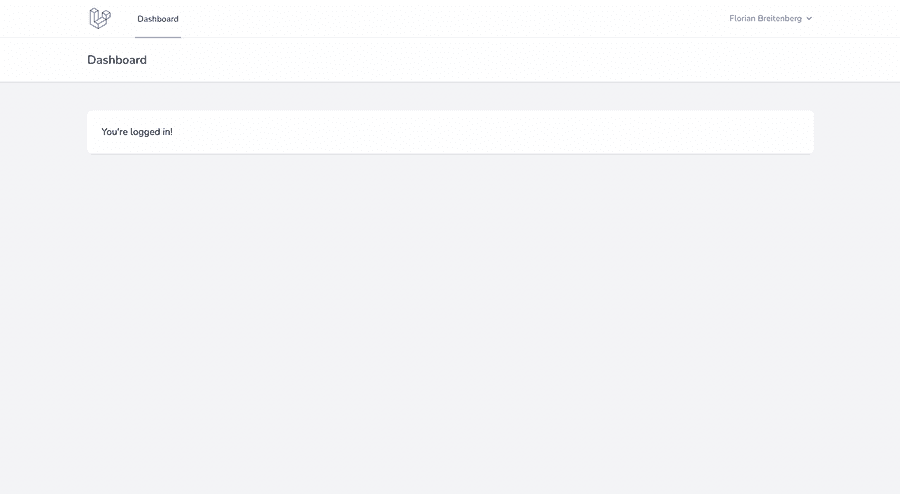
Let's try to use the [email protected] account and the password (password 🤫) to login.
And guess what? We are in 🚀
Some Socialite would be nice!
Now, that we have the backend and the frontend for blah we are ready to go! Let us start the juicy part, shall we?
Let's begin by requiring Laravel Socialite. Socialite is a package from the Laravel ecosystem that extracts the logic of interacting with OAuth providers and facilitate, by a lot, our work!
To install Socialite run the following command inside the root folder of blah-be:
Now, and since we will allow our users to login into Blah with multiple providers, let's setup what we need for OAuth which means create the model, the migration, the controller and the factory.
NOTE:
The
--apiwill apply Laravel conventions to our OAuthProviderController and create theindex,store,updateanddestroymethods.
Let's start by updating our migration for the o_auth_providers table in our database like below:
database/migrations
Since some users prefer to login with OAuth, we can't make the password field required in our migration for the users table.
To solve this we just need to make the password field nullable by calling the ->nullable(); method in our migration and, of course, run the migrations again!
database/migrations
A user can authenticate with multiple providers and we need to keep track of that. With that said, it's obvious that a user hasMany providers and a provider belogsTo a user!
Let's update our models and define our Eloquent relationships for both models and also update the fillable and hidden fields for the OAuthProvider model.
app/Models/User.php
app/Models/OAuthProvider.php
PHP 8.1 introduced Enums and Laravel quickly added features to enhance the development experience.
For now, let's create our OAuthProviderEnum and define the GITHUB case like below:
app/Enums/OAuthProviderEnum.php
One of features that Laravel has around Enums, in order to enhance the development experience like referenced above, was the validation of the value passed to the endpoint through model binding. To use this feature you just need to cast the wildcard defined in your route directly in your controller. Let's see a real example to understand better!
In your OAuthProviderController add the following to the index method:
app/Http/Controllers/OAuthProviderController.php
In this index method we are saying that the $provider will be cast to OAuthProviderEnum and Laravel will ensure and validate that the value for this variable exists in the Enum.
To test this out, and since we will need the route for our functionality, let's update our routes/auth.php file and add these two routes:
routes/auth.php
This piece of code will create the /login/{provider} and /login/{provider}/callback routes so that we can redirect the user to the OAuth provider and the OAuth provider redirects the user back to blah.
If you try to access http://localhost/login/facebook you will probably be faced with a 404 page which means that our model binding with the enum and respective validation
is working correctly! 🥳
NOTE:
To ensure that you are using Model Binding correctly, the wildcard in your route should be written in the exact same way as the parameter of the function!
Before testing the full feature let's add the necessary code to create a user and register the provider that the user used when the OAuth provider redirects the user back to blah.
app/Http/Controllers/OAuthProviderController.php
NOTE:
Do not use
redirect(env('FRONTEND_URL'))theenvfunction should only be used inside your config files. If you want to know more please have a look here
From the code perspective, there are only two steps missing in the backend which are:
- update our service providers and add github
- update our environment variables
Let's start with the providers and update our config/services.php file.
config/services.php
Well, it looks like we will need to define GITHUB_CLIENT_ID, GITHUB_CLIENT_SECRET and GITHUB_REDIRECT_URI in our .env file ...
.env
But? 🧐 Where can I get these values? Normally, each OAuth provider has a developer page where you can create applications. Taking as an example GitHub, you can access it here. We just need to fill in the form correctly!
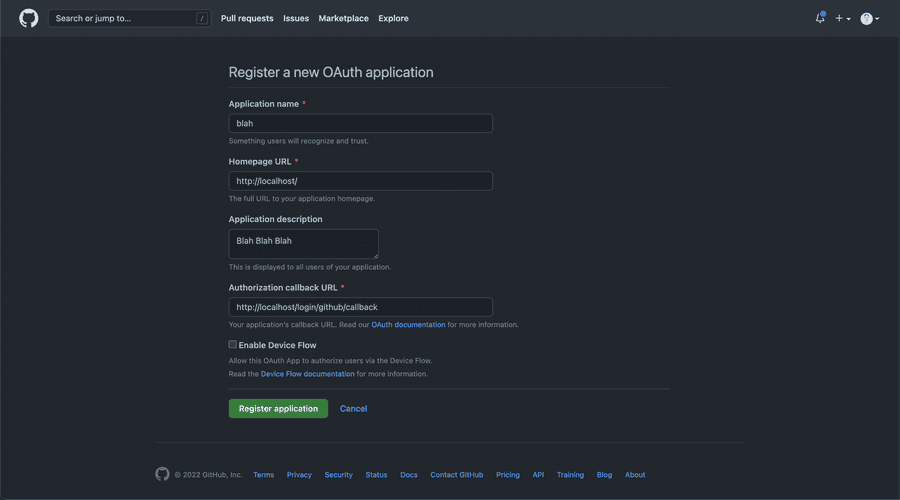
NOTE:
The
Authorization callback URLis very important as it's the URL where the provider will redirect the user back once they login.
After filling the form correctly and clicking Register Application you just need to get your client_id, generate the client_secret and put them in our .env correctly for both GITHUB_CLIENT_ID and GITHUB_CLIENT_SECRET.
Regarding GITHUB_REDIRECT_URI it should be the same as you define in the route and that you filled in the form, which is http://localhost/login/github/callback.
Git things done!
Now that the backend OAuth integration is done let's update our NextJs app and add a button to login with GitHub!
For that, update your login.js file for blah-ui and add the following below the typical login button
src/pages/login.js
Let's try to click it?
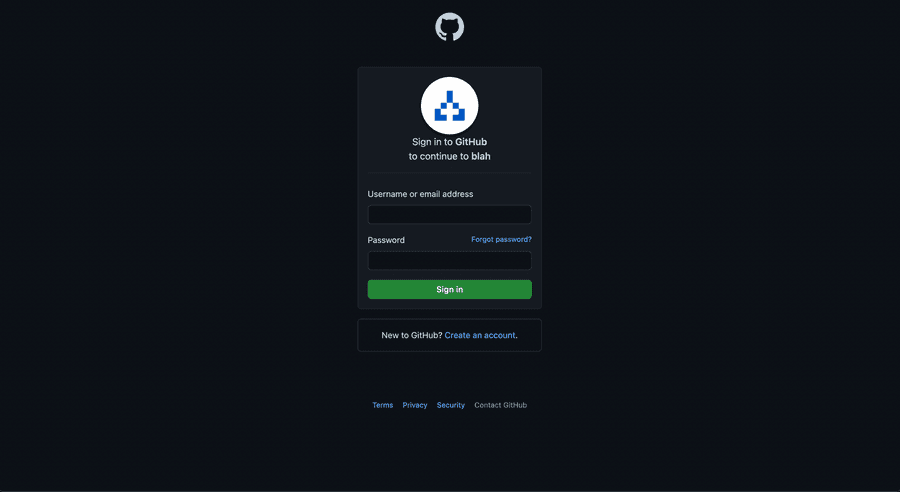
If you did everything correctly, the page above should be presented to you and after putting your credentials you should be redirected and logged in into blah!
Gimme more!
Laravel Socialite allows you to login out of the box with providers like Facebook, Twitter, LinkedIn, Google, GitHub, GitLab, and Bitbucket but what about other providers?
Socialite Providers provides a huge collection of OAuth integrations. Setting them up is really easy to prove it to you, let's implement login with Discord!
After installing the package we need to update our EventServiceProvider and add the respective listener:
app/Providers/EventServiceProvider.php
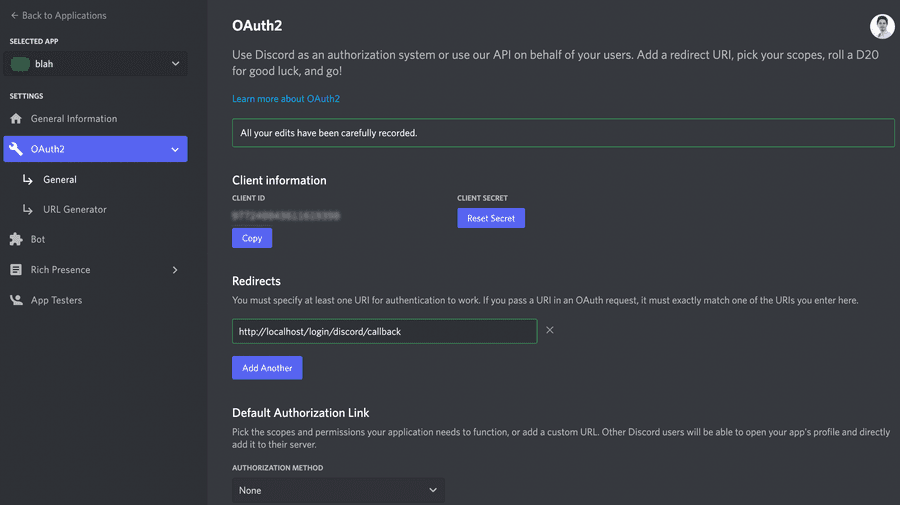
Now, we need to create the application in the OAuth provider, which in this case is Discord. For that, go to the developer page and create a new application called blah as we did for GitHub!
After the application is created, reset your client_secret and save it alongside the client_id. Also, the redirects must be
defined to our callback route with correct path, which theorically should be http://localhost/login/discord/callback.
The image below shows the configuration as you need and as it should be.
After this step, we need to do some changes in both blah-be and blah-ui applications.
Starting with blah-be, we need to add Discord to our OAuthProviderEnum in order to be validated and approved as a valid provider.
app/Enums/OAuthProviderEnum.php
The config for the services also needs to be updated and discord needs to be added as a new service like so:
config/services.php
Finally, and to wrap up our backend implementation, we need to add the secrets to our .env file 🔥
.env
Regarding blah-ui we just need to add a new button on our login page (as we already did previously for GitHub) for our new provider
src/pages/login.js
After this, your login screen should be something similar to the following image

If you click either GitHub's or Discord's links you should be redirected to the provider login page. Taking Discord as an example now, you should see something like this
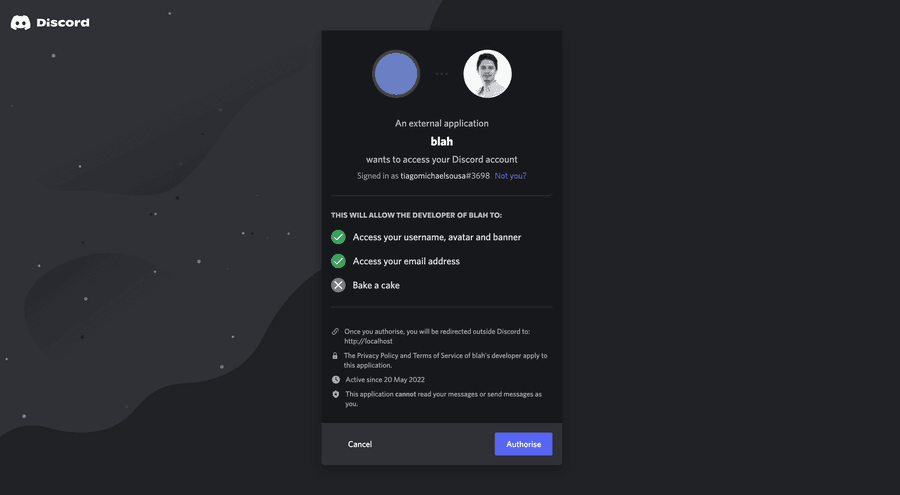
And after authorizing the access to blah you should be redirected and logged in! 🥹
Conclusions
If you took the time to read this article, I hope that it helped you somehow!
As always, you can find the implementation for the entire article in this Pull Request!
If you found this article interesting, feel free to share it with your colleagues and friends, because you know... Sharing is caring!
Also, if you enjoy working at a large scale in projects with global impact and if you enjoy a challenge, please reach out to us at xgeeks! We're always looking for talented people to join our team 🙌

Written by Tiago Sousa
Hey there, my name is Tiago Sousa and I'm a Fullstack Engineer currently working at xgeeks. I'm a technology enthusiast and I try to explore new things to keep myself always updated. My motto is definitely "Sharing is caring" and that's exactly why you are currently reading this!
